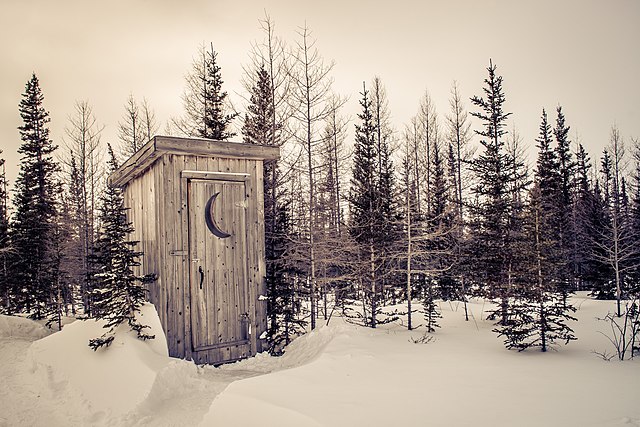
In an age of modern conveniences, the idea of an outhouse might seem quaint or outdated. However, there’s a certain charm and practicality to having an outhouse that transcends its rustic nature. They’re especially useful if you live off-grid or are passionate about protecting the environment. From connecting with nature to promoting sustainability, here are some compelling advantages of why you should add an outhouse to your property. Here’s the scoop on one of the easiest ways to add an outhouse to your property by building an outhouse kit.
Before You Build
The first thing you’ll want to do when planning to build an outhouse kit is to make sure that an outhouse is permitted on your property. You’ll want to research local codes on the minimum distance needed between septic and water sources. Keep your eyes open for any restrictions on size and depth. If you’re having trouble finding information online, do not hesitate to call your city office to ask for resources.
Picking the Placement
Where you build an outhouse on your property is a very important decision. Your choice of placement will determine how convenient and how functional your outhouse is. You’ll want to pick an area that will be convenient to get to from your main living space, but far enough away that it isn’t a nuisance. Typically 150 feet is the minimum recommended distance from your main building. You’ll also want to be considerate of where your outhouse will be in relation to your water source. Do not build your outhouse uphill of your drinking water, or it may become contaminated. Additionally, place your outhouse 50 feet away from lakes, streams, ponds or other bodies or water.
There are also other factors to consider, such as visibility: do you want to be able to see your outhouse from inside your home, or do you want it out of eyesight? You’ll want to avoid any utility lines, so if you have a map of where those are on your property use that to help inform your choice of positioning. If you want to make the process of site preparation easier, choose an area on your property that is level. Avoid low points on your property that might collect water in storms.
Choosing Your Outhouse Kit
Buying an outhouse kit is by far one of the easiest ways to add an outbuilding to your property. If you value convenience and cost efficiency, you’ll probably want to choose this option over designing and building one on your own. When choosing an outhouse kit, there are some things to keep in mind. Since sooner or later you may need to move your outhouse, you’ll want a building that is both lightweight and durable. Plus, it must have the necessary outhouse features like a comfortable bench and ventilation. Finally, consider aesthetics. An outhouse doesn’t need to look good to work properly, but an attractive building is always a plus.

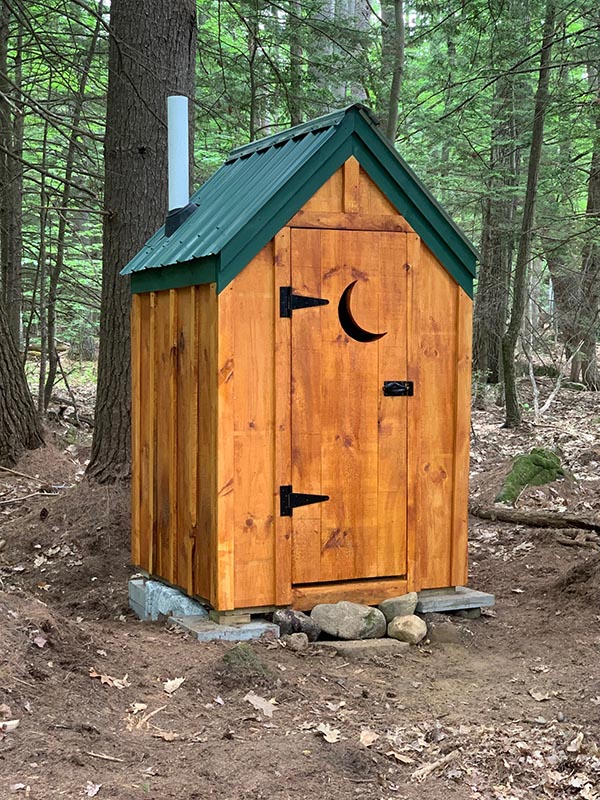
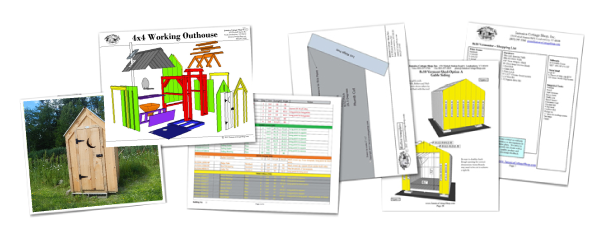
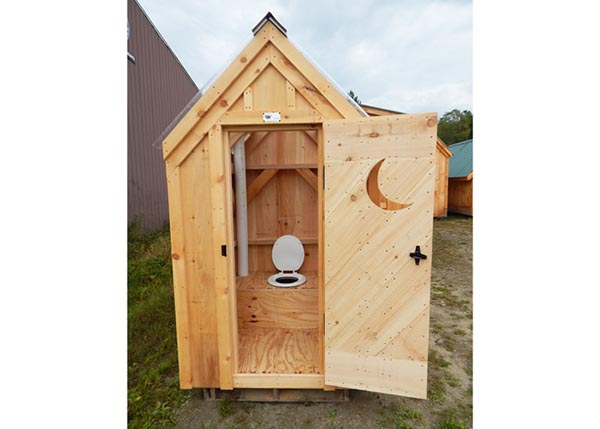
There are a number of outhouse kits that can be found online to suit your needs, but hear us out on why we really stand behind ours. The Jamaica Cottage Shop Working Outhouse Kit is specially designed to be easy to build, without compromising on quality. The framing of this outhouse is made with solid 4×4 Hemlock posts, which are twice as thick as traditional 2×4 planks. The footprint of our Working Outhouse kit is four feet by four feet, which is a comfortable size for use, but small enough to fit on many properties.
Our outhouse kit also includes essential elements such as an outhouse bench, a toilet seat, an outhouse hopper, and a PVC ventilation pipe with a vent boot. There’s no guesswork needed to build our kits, since they come with detailed diagrams and instructions, and the pieces in the outhouse kit are already pre-cut, making assembly much easier. Plus, you can customize your kit by adding decorative siding or a colorful roof.
Before you build
When the kit of your choice arrives, first read through all the building instructions to familiarize yourself with the entire process. This will help you be able to execute your build faster. Make sure your site is properly prepared, and that the ground is level and compacted. Until you are ready to build, keep your outhouse kit safe, ideally in a dry environment or a well-ventilated area. Do not store your kit for a long time, or let it get exposed to the elements.
On building day, first unwrap all the parts of your kit and organize them in a way that will help you complete your build efficiently. Your kit’s instructions may advise you on the best way to do this. Jamaica Cottage Shop kits have color-coded parts, making the initial organization step easy.
Digging Deep
Traditional outhouses are built over a hole that acts as a receptacle for wastes. The hole will eventually fill up, and you’ll need to move your outhouse just a little bit onto a new location. This can take a while if you use the outhouse infrequently, but homesteaders who exclusively use their outhouses may have to move their outhouse once a year. Digging a deep enough hole when building your outhouse will ensure the longevity of the structure, and keep things sanitary.
The minimum recommended depth for an outhouse hole is four feet. If you’re building a Jamaica Cottage Shop outhouse kit, we advise 4-6 feet deep. In order to make sure your hole is well positioned, start by building a wooden square that matches the dimensions of your building, and set it into the ground where you want to place your outhouse. You can use this box as a guide for where to dig the hole for your outhouse. Do not have the hole exceed the boundaries of the box, otherwise your outhouse will not be sitting on a solid foundation. For larger or deeper holes, consider building cribbing to help maintain the structure of the hole. Here’s one DIYer’s photographs of how he dug his outhouse pit and added cribbing.
The Building Process
Once the hole for your outhouse is in the correct position, you can begin to build the structure of your outhouse. Outhouse kits from different manufacturers will have different instructions for this process. Generally your build will start with the flooring system and posts, and progress to installing the walls, framing, and interior features and finally the doors, trim, and roof. Refer to the plans that come with your kit for all the details! Small outhouses can be built by one person, but we always recommend having a partner when taking on DIY project of this scale, because it will be safer and more fun! As with any DIY project where power tools are involved, make sure you are wearing protective gloves and glasses to keep yourself safe.
One benefit of purchasing an outhouse kit is that the manufacturer will likely have resources available to help you with your build if you get stuck, or have questions. It’s less intimidating to build an outhouse from a kit than trying to source and cut all the materials yourself. If you do choose a Jamaica Cottage Shop Outhouse Kit, we have dedicated staff that will help guide you through your building process. So if you need help, we’re only a call away!
Caring for your Outhouse
Once your outhouse kit is complete, there are a few things you’ll need to do to maintain it. For one, be conscious of what you put into it! As a rule, only waste and toilet paper should go into your outhouse. Things like trash, baby wipes and diapers won’t break down properly, so don’t let those go in. To keep bugs to a minimum, you can place a bit of screen over the ventilation pipe for your outhouse.
You should find a substrate to sprinkle into the outhouse hole to help aid in decomposition and to keep odors to a minimum. One effective and thrifty option is to use ashes from wood burning: just sprinkle some into the hole after using the facilities. The wood ashes actually help aid in decomposition, so your outhouse will fill more slowly. If you live on a homestead, there’s a chance you have wood ashes readily available. You can also use lime or calcium hydroxide in the same way, and it can be purchased from feed stores. Don’t get this on the toilet seat though, it may cause chemical burns.
The time may eventually come for you to move your outhouse. When you do, you’ll have to perform the same process you did initially to prepare your outhouse site. On level, compacted ground, settle a wooden box into the surface and dig a hole of appropriate size and depth. Then using the proper equipment, move your outhouse onto the new foundation. Finally, fill the old outhouse hole with dirt, and you’re all set!
The Benefits of Having an Outhouse

Building an outhouse kit on your property can have many benefits. Generally speaking, there are three big reasons why people choose to put an outhouse on their property: environmental protection, cost reduction, and independence.
Living an eco-friendly lifestyle not only reduces your carbon footprint, but it can bring the joy of feeling close to nature. An outhouse is the ultimate eco-friendly solution for waste management. It requires no water to maintain, saving this precious resource. Additionally, all the energy and chemicals that go into waste treatment are eliminated. A well designed outhouse will break down a great deal of the waste without polluting the environment.
Reduced consumption also means reduced costs. By using an outhouse, you will save a lot of money on water typically used to flush toilets. It is far easier to set up and maintain an outhouse than it is to install a traditional flushing toilet system. Furthermore, if you choose to build your Outhouse from a kit, you can save on the labor costs it would take to hire contractors to build for you.
Off-grid living is becoming more and more popular. Outhouses are often practical necessities for those who want to homestead in areas where there are no municipal utilities. Choosing to use an outhouse instead of traditional plumbing reduces reliance on external resources. It also promotes a self-sustaining lifestyle that is both good for you, and for the planet.
Building an outhouse kit on your property can be a fun and rewarding experience. We hope our guide has helped you prepare for what the outhouse building process will be like, and has motivated you start looking for which outhouse kit is right for your lifestyle. Good luck and happy building!