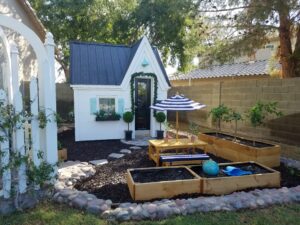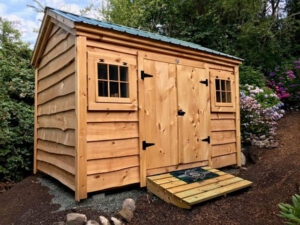
So you’ve found the perfect shed or cottage to add to your property! Now the real work begins, that is, setting a good foundation for your new building. If you want your new shed or outbuilding to last for many years, you’ll want to invest time and effort into building a solid foundation for it. With our many years of experience building sheds, cottages, cabins and more, we can safely say that laying down a gravel pad for your shed is one of the best options for a shed foundation. Here’s why you should choose a gravel foundation, and how to properly install a gravel foundation.
Can I put a shed on gravel?
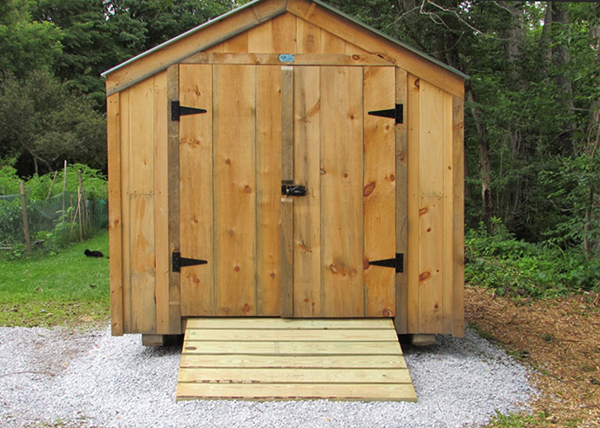
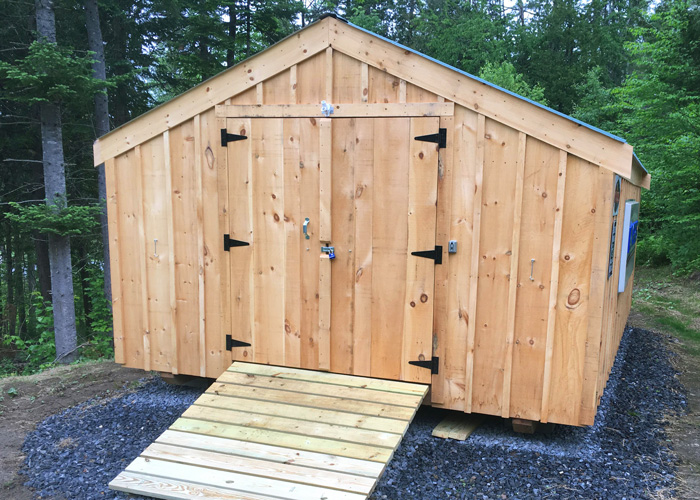
The short answer is yes! Sheds can sit on a gravel pad or foundation with no problem. Gravel actually has a number of properties that make it an ideal bed for your building. While you can place a shed directly on a compacted gravel pad, we highly recommend using cement blocks in addition to just the gravel pad.
Why Install a Gravel Shed Foundation?
Gravel Foundations Provide Great Drainage
In order to protect the substantial investment that is your shed or cottage, you want to reduce the risk of it becoming damaged by water exposure. Luckily, a gravel foundation provides very good drainage, which will keep your building’s skids and joists from sitting in water. While your shed can tolerate water exposure (it has to be outside, after all!), the floor system shouldn’t be allowed to become chronically waterlogged, otherwise the skids and joists might rot, causing damage to the whole building. Gravel foundations are a great way to prevent this from happening.
Gravel Pads Distribute Weight Evenly
If you plan on storing some heavier items in your shed, a gravel foundation is a good choice. A gravel foundation offers a great deal of support and good weight distribution. A concrete pad offers even more support, but these are typically far more expensive and difficult to install. For smaller outbuildings, a gravel foundation will be just as good as an extensive concrete one.
Gravel Foundations are Easy to Install
If you want to DIY your project, a gravel foundation is the way to go! They are easy enough that you can install them on your own, without help from a contractor. If you have intermediate skills with tools, you can probably successfully make a gravel foundation on your own. Plus, you don’t need any heavy machinery, which means minimal damage to your yard. All you need are some basic power tools, a wheelbarrow for the gravel, and a compactor.
A Gravel Foundation is Cost-Effective
As if there aren’t enough reasons already, finally installing a gravel foundation is an economical choice. The gravel itself is typically quite inexpensive, but the price will vary depending on where you live, and the cost of delivery. You can rent a gravel compactor instead of purchasing one outright, which also keeps costs down. Plus, because this is a project you can do yourself, you save money on the cost of hiring a contractor.
What to do Before You Install A Gravel Foundation
Before you pick the spot where you want to build your foundation, check with your local government about whether you will need a permit for your shed, and if there are certain rules you will need to follow when picking where you want your gravel foundation. For example, towns often require that your building has a setback from your property line and other structures, which will influence where you can install your foundation. Call your local clerk and start with these questions:
• What are the required setbacks for a shed?
• What are footprint regulations? (Percentage of yard that can be covered by a shed)
• Is there a maximum size building allowed to be built without a permit?
• If I do need a permit for my shed, what do I need to obtain it? How much will it cost?
• What foundation types are allowed on my property?
• Does my shed or cottage need to be anchored? (You may need to install concrete piers or another anchoring system)
How to Choose the Site for a Gravel Shed Foundation
Now that you’ve got your shed picked out, and all the information you need, it’s time to pick out where your shed will go! You probably have a location already in mind, but before you get to digging, check first that it meets these criteria as much as possible:
Pick a Foundation Site with Good Drainage
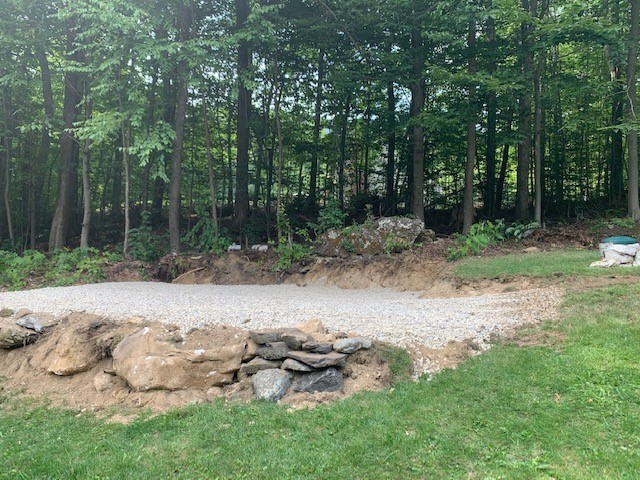
As aforementioned, proper drainage is key to maintaining your shed. Ideally, you should pick the highest spot in your yard. Avoid areas that you know get waterlogged after rain. The right location in combination with gravel’s good drainage will ensure your shed stays dry.
Build On Undisturbed Soil
Ideally, try to pick a location where there hasn’t been any recent digging. Soil compacts and settles over time, so if you build on recently disturbed soil, your foundation might shift and become un-level. Be especially mindful of this if your home was recently built, or if you had other major construction on your property.
Choose a Level Building Site for your Gravel Foundation
Chances are you will probably have to level your building site to some extent no matter what. But your job will be much easier if you pick a site that is already mostly level. Check the ground’s slope. If it is greater than 6 inches, you should have the site leveled before you start digging the gravel bed. If it is fewer than 6 inches, you can correct the slope somewhat as you prepare your gravel foundation. In these cases, it is useful to build a perimeter box (more on that later).
Find an Area that is the Right Size
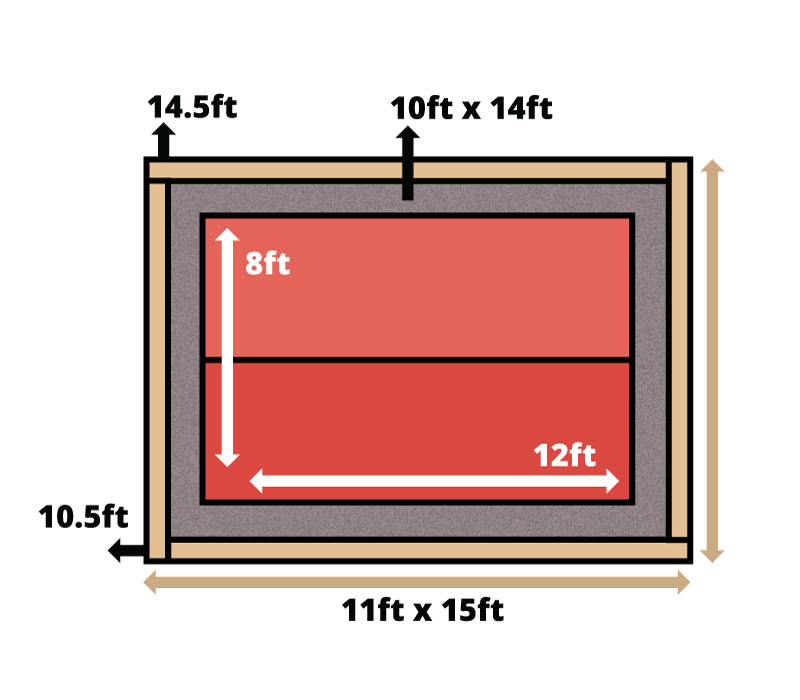
This seems straightforward, but it does require some consideration. Make sure the area where you put your gravel foundation is open, clear, and large enough to accommodate the size of your building and foundation. The size of your foundation should be the area of the building, plus a foot on every side. For example, if you have an 8×12 shed, your gravel foundation will need to be 10ft wide by 14ft long. Your shed will sit right in the middle of the foundation, and leave a foot of gravel on every side. You may want to make your gravel pad even larger if you plan on installing a ramp for your shed.
Materials You Will Need to Build a Gravel Foundation
The materials you need to build a gravel foundation will depend on what type of foundation you are planning to build. You can make a gravel foundation with or without a box. One major difference is that when you use a wooden box as the perimeter for your foundation, you can elevate the gravel foundation above ground level. This can help correct for an uneven slope.
Materials For A Gravel Foundation
A gravel foundation without a retaining wall requires minimal materials. All you really need is the gravel itself, and a weed barrier or stabilization fabric to separate the soil from the gravel. Not only will this fabric keep pesky weeds at bay, but it will also help contain the gravel and make the foundation more sound. Finally, we highly recommend installing concrete blocks at the most weight-bearing points on your shed. You will need as many concrete blocks as there are posts in your building. Refer to the floor plan of your building to see where the posts are.
Materials For A Gravel Foundation With a Box
If you plan to place your gravel pad inside a retaining box, you will need the same things to build a simple gravel foundation, plus some extra items. You will need pressure-treated lumber for the foundation’s box or retaining wall. The size of your lumber should be 4×4, 4×6, or 6×6, and long enough to contain the perimeter of your gravel foundation. Exterior screws will be used to attach these beams to one another. Additionally, you will need rebar stakes. These are important for keeping your perimeter firmly place.
Choosing The Right Kind Of Gravel for a Foundation

Finally, the most important material you’ll need is the gravel! Make sure you purchase the right kind of gravel, otherwise you risk your shed becoming un-level. It may surprise you to find that you technically aren’t purchasing gravel at all! You will need to buy ‘Crushed Stone’, which has angular edges and corners that allow it to lock together when compacted. Look for ‘Clean Stone’ at ¾ of an inch. What this means is that the rocks are less than ¾ of an inch in diameter, and fine dust particles and tiny rocks have been removed. The reason why it is good to have clean stone is that if your crushed stone contains too many fine particles, when it is compacted, it will not drain as easily. Remember, drainage is important!
DO NOT buy normal gravel! Technically gravel refers to river stones, which have smooth edges. This kind of stone might be attractive and nice under foot, but it is NOT suitable as a shed foundation, because it can’t be effectively compacted.
The amount of gravel you purchase will depend on your foundation’s size and depth. Gravel suppliers might have advice for how much you will need to purchase. You can also use an online calculator to give yourself an estimate of how much gravel you will need. It’s always better to purchase too much than too little. If you run out of gravel, your foundation will be inadequate. Extra gravel can always be used for other projects or landscaping.
Tools and Supplies You Will Need To Install A Gravel Foundation
Luckily, installing a gravel foundation actually doesn’t require too many tools. Here’s what you’ll need to successfully build a gravel foundation:
Marking Paint or Stakes and String Lines: These will be used to mark out the perimeter of your foundation
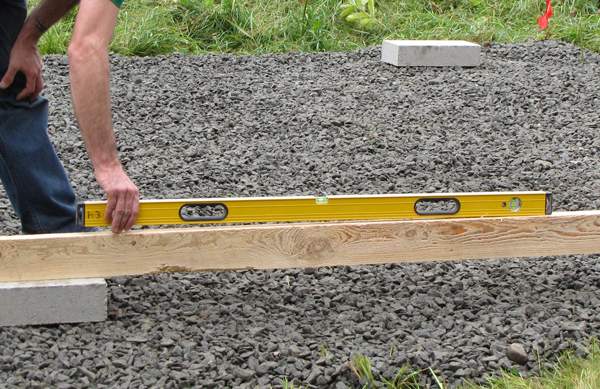
A Level: You absolutely need this to make sure your ground is level! A 48 inch carpenter’s level is a good choice. Additionally, you can also use a string level or a laser level.
A shovel and wheelbarrow: Whether you choose to excavate only by hand, or are going to use some machinery to help, you will need a shovel to finish the edges of your foundation. The wheelbarrow will help you remove soil and place your gravel.
A firm metal rake: You’ll need the rake to help you spread the gravel evenly. Make sure it’s not flimsy!
A tamper or plate compactor: A handheld tamper can be used to compact your gravel. Alternatively, you can rent a compactor that will help expedite the process, and get your foundation more tightly squished together.
A tape measure: This one is an essential on almost every project!
Safety Equipment: Don’t forget your gloves, safety glasses, and earplugs if you are using heavy machinery.
If building your gravel foundation in a box, you will also need:
Drill and Auger Bit: Use the drill to screw together the pressure treated lumber planks. The auger bit should be ½ inch, and at least 18 inches long. This will be used to drill holes in your perimeter to insert rebar stakes.
Sledgehammer: Use this to drive the rebar stakes into the perimeter boards and ground.
Circular Saw: For cutting the wood for your perimeter. With the proper blade, you can also cut your rebar stakes to the proper size, if they aren’t already pre-cut.
How to Install a Gravel Foundation for a Shed or Cottage
Now for the hands-on part! We’ll take you through the process of building your very own gravel foundation for your shed or cottage.
Measure the Foundation Perimeter
Calculate the size foundation you will need, and start staking out the perimeter. Remember, your foundation should be the size of your shed, plus 2 feet. If you are going to build a wooden perimeter that is inset into the ground, you will need about 8-12 extra inches per side to keep room for the lumber. We highly recommend drawing out a simple layout of your shed and foundation before you start digging.
Make sure you also map out where you will position the concrete blocks that the shed’s skids will rest on: you will need to make sure they sit right under the posts of your shed for the best weight bearing.
Use temporary flags to mark the prospective corners of the foundation. Once you’ve measured out the four corners, make sure you take a diagonal measurement. The diagonal measurement should be the same for both sides: that’s how you’ll know that your corners are at right angles. Once you are confident with your measurements, use the marking paint or string to indicate where you are going to dig.
Measure the Slope of Your Site
Using a level of your choice, measure the slope of your building site from corner to corner. We recommend using a string level, as they are inexpensive, easier to use, and better suited than a straightedge level. If your site has a significant slope to it, you will either want to level your site, or choose to build your gravel pad with a retaining wall perimeter that will make your building site level.
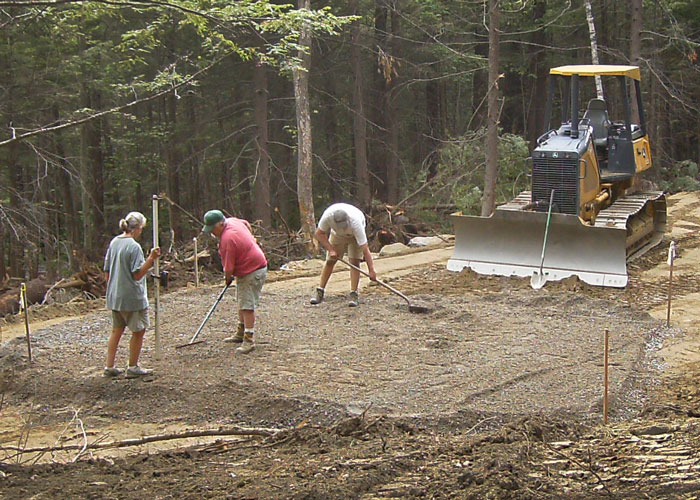
Excavate Your Foundation Site
Now it’s time to get digging! The depth of your dig will depend on what kind of shed you are installing, and what type of perimeter you will use. Small sheds will typically require 6 inch deep gravel foundations, while large cottages may need a foundation of up to 12 inches. Check the shed manufacturer’s recommendations beforehand to see how deep your foundation will need to be. Your digging depth will be shallower if you are building a perimeter and foundation that will sit slightly above ground.
Build the Perimeter Box
*Skip this step if you aren’t building a wooden perimeter
Cut and measure your wood so that it will fit properly around the perimeter. You will want the interior of your box to be the necessary dimensions of the gravel pad. For example, an 8×12 shed needs a 10×14 gravel pad. That means if you are using 6×6 pressure treated wood for your perimeter, you will want to add 6 inches to the length of every side to know how long your wood beams should be.
You may need multiple beams to span a single side, so plan accordingly. Ideally your perimeter wall will be 2 or 3 beams thick, so between 8 and 18 inches high, depending on how thick your beams are. You can also lay down just one layer of lumber for a more simple perimeter, although this won’t allow you to correct for a building site with a very steep slope.
Add the first layer of lumber all the way around your perimeter. As you work your way around, use your carpenter’s level to make sure your first layer of beams goes in straight. You can use your hammer to tap on the high side of the beams until they’re level. Once you have the first row of beams in place, measure the diagonals to make sure they’re equal length.
Start placing the second row of lumber on top of the first. Make sure the lumber overlaps the seams on the layer underneath. Use exterior screws to attach the lumber to the bottom row: the length of the screws will depend on how thick the lumber is. Be attentive to reinforcing the corners. Place your screws about every 2 feet along the length of each side. Keep building up your perimeter until you reach the desired thickness.
Once your perimeter is in place, it’s time to stake it into the ground with rebar. Use your auger bit to drill a hole from the top of the boards into the ground. Place one hole every 6 feet along the perimeter. Be sure the hole is going deep enough that the stake will go all the way through into the ground beneath. Your rebar stakes should be between 2-2.5 feet long. Using your hammer, drive them through your beams and into the ground. Finally, fill in any gaps around your new perimeter with soil, and compact it down.
Install the Gravel Foundation Lining
Before you install the lining, do one last check to make sure the ground is level, and do a diagonal measurement to make sure the corners of your site are square. Cut your construction fabric or weed barrier to a large enough size to cover the interior of your site, plus a couple of inches up the sides. If you’ve built a wooden perimeter, you can use a staple gun to attach the edges of the barrier onto the inside of the frame to keep it in place.
Laying Down the Gravel
Now it’s the moment you’ve been waiting for! Using your wheelbarrow and a shovel, add about four inches of gravel over the entirety of your weed barrier. Use the rake to spread the gravel evenly before compacting it down with either a tamper or plate compactor. Repeat the process again, placing four inches of gravel before compacting. Do this until your gravel pad is level with the top of your barrier, or with the surrounding soil. Check once more that your gravel pad is level.
Now it’s time to install your concrete blocks! Measure out the area of your shed on the concrete pad, and place one concrete block at each corner. Additionally, place one concrete block beneath any other posts in the building. Take diagonal measurements and make sure all the blocks are in a straight line. Once you are confident they will sit underneath the skids of your building correctly, you can nestle them into the top of the gravel. You can also dig out a little bit of the gravel so that the blocks are partially embedded into the top layer of grave. If you do this, make sure you compact the gravel around the blocks to make sure everything is firmly locked into place.
Once the blocks are in place, check to make sure the blocks are level. You might have to do a little adjusting, but once everything is squared away, that’s it! Your new foundation is ready to become the home of your new shed or cottage. Congrats!
Final Thoughts on Using A Gravel Pad Foundation
Installing a gravel pad foundation is a cost-effective way to give your new shed or cottage a solid foundation. Not only that, it is certainly within the capabilities of most intermediate-level carpenters and DIY-ers to undertake this project without professional help. Remember, planning is key. Knowing the ins and outs of your local building codes and ordinances will save you from having to make costly modifications later.
There are many resources online to help you through the planning process. If this is your first time building a gravel foundation, watch Youtube videos and read up as much as you can on the process. And if you have questions about what foundation is right for a Jamaica Cottage Shop shed or cottage, our team is here to help.