Each of our customers has unique tastes and styles. That is a given with the DIY mindset that so many of our creative clientele share. Because of this, we get tons of requests for uncommon design features. While we offer various siding, roofing, and flooring options for personalization, odd, shaped windows and doors become less frequent in our designs. But that does not mean you can’t incorporate odd-shaped windows into your build. We walk you through how to install odd-shaped windows in this DIY custom window installation tutorial.
Some popular and oddball window shapes include:
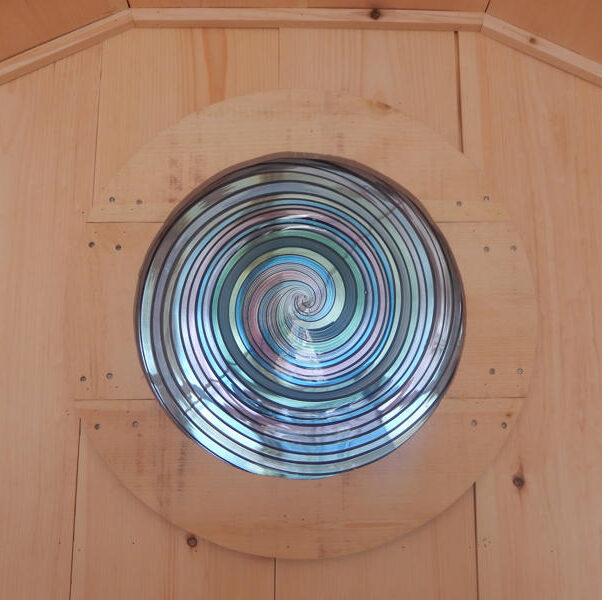
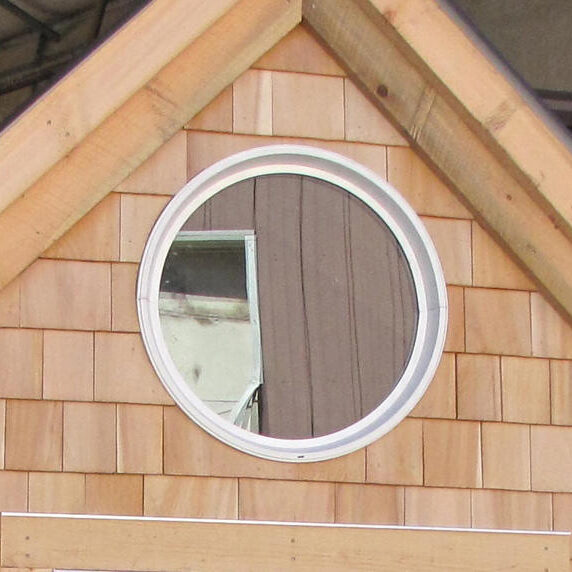
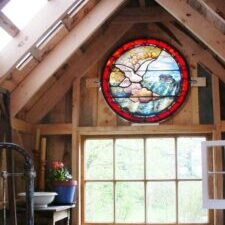
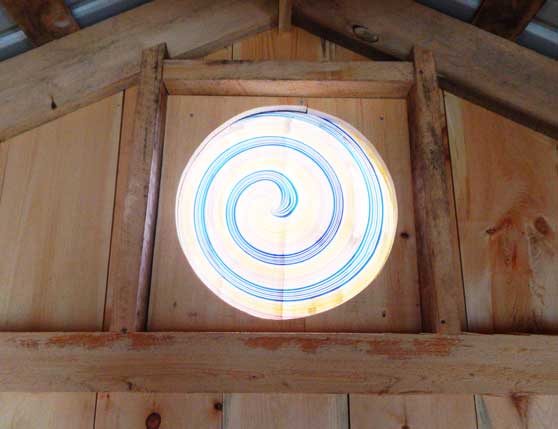
• Round Windows – these are great if you want a unique and secure way to bring in light. Most round windows come fixed, making them harder to breach. Our hand-crafted roundels may be ordered as is, or encased in an insulated window. They are one-of-a-kind and add a pop of color.
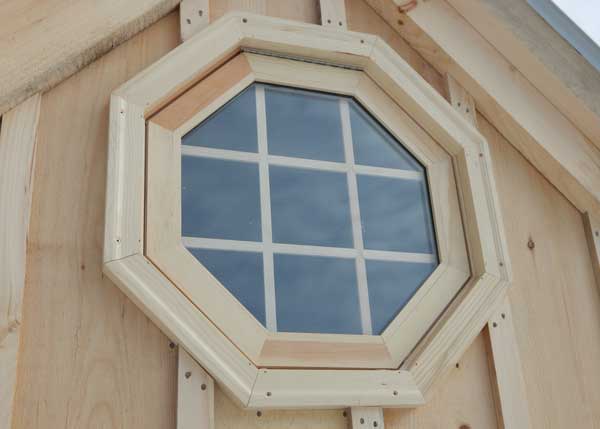
• Octagon Windows – These get placed in the gable ends of some buildings or look great set on either side of a door. This geometric style gives off a fashionable appearance.
• Triangle Windows – Usually, customers build these up near the roofline. Many window manufacturers can build custom windows to match your roof angles.
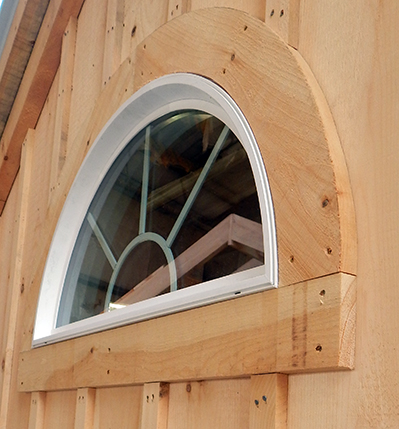
•Arched Windows – Placing arched windows above a door, or another rectangular window is popular. They would look cute installed along the bearing walls with arch-shaped window shutters too.
A Note About Fully Assembled Buildings
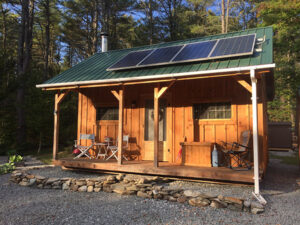
We can install odd-shaped windows with a custom assembled building. We already offer roundels and octagonal windows and may look into selling other shapes in the future. Some of our designs already include roundels, like our Xylia cabin and Writer’s Haven. We charge a small fee per opening for special requests, so be sure to ask our sales team any questions about pricing while you plan out your post and beam building design.
Before you begin, familiarize yourself with this terminology:
Top Plate – A horizontal beam that sits on top of your wall posts.
Nailer – A horizontal board that provides additional structural support and a point where siding gets nailed to. Nailers also function as the bottom support of a window frame.
Stud – Vertical boards used to frame out the sides of your windows and doors.
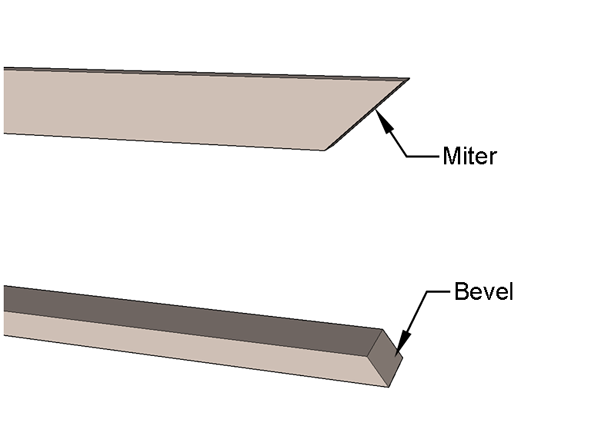
Corner Blocks – Pieces of lumber with mitered ends that shape out the rough opening for your custom window design.
Mitered End – The end of a piece of lumber cut at an angle to match the pitch of your roof. Lumber will need mitered ends cut to match the shape of your window. The corner blocks in the image below have mitered ends.
Rough Opening – the width and height of the opening that your window or door will fit in.
Building Odd-Shaped Windows in a Kit
When you are getting a cottage kit and want to install odd-shaped windows, you will need to figure out how to do that on your end. Custom windows do not come with framing and trim. That means you will need to order additional lumber to frame them out. Calculating needed lumber will be your responsibility for getting the correct quantity and lengths.
You can order hemlock and pine boards from our sales team. Additional lumber will not be pre-cut, stickered, or outlined in the cut list or the step-by-step instructions. We ship these in rough lengths (8’, 10’, 12’, etc.). However, with these general guidelines, you will be able to frame out nearly any window shape.
Basic Window Framing Tips
Generally speaking, the first step to framing any window is to create a box with a rough opening that is a ½-inch wider and taller than the overall dimensions of your window. This half-inch provides wiggle room. Then the window fits snugly without needing to be jammed in.
Install Custom-shaped windows above the top plate (in the gable ends), along bearing walls set on nailers, or in dormers. Where ever you choose to place it, make sure that there is enough room for the framing box to be half an inch wider and taller than your window. Utilize mitered corner blocks to fine-tune the shape of your framing to your window.

Here are some general, step-by-step instructions to frame and trim your odd-shaped window.
Step One – Nailers
First, you need to create the bottom base for your window. You will probably want to install a nailer, especially if you want the window to be placed high up in the gable end. The nailer will need to fit snugly between the rafters and have the ends mitered to match the roof pitch. You can also use the top plate as the base, but if the window is going above a door, it might look odd not to have some space between the two elements if there is a lot of space between. If you are installing your window on one of the bearing walls, or below the top plate, you can use the nailers included with your kit.
Step Two – Studs & Headers
For each window, you will also need two studs and a header. Make the header by building another nailer. Create a double-locking header when installing in the gable above the top plate. Create these headers by using two pieces of 2×4 hemlock lumber with mitered ends that match the roof angle. Place one of the 2×4’s between the rafters (so the longest point will need to fit between them). The other one needs to be longer since it will be nailed to the inner side of the rafters.
Step Three – Corner Blocks
Octagon windows will require corner blocks, and round windows might benefit from them. Cut a 45-degree angle for the miter. Don’t forget that your rough opening will need to be a half-inch wider and taller than the actual window.
Step Four – Insulated Window Steps
As you are installing your siding, you will need to trim it to match your rough opening. Some people use a router for this step, others use a saw. You can have one person hold the siding from the outside and another person can trace out the shape if you take this route.
If your building is insulated from the outside you will want to add wall sheathing and insulation nailers before you install the siding. Nail these pieces to the exterior wall sheathing. When you add your vapor barrier and insulation you will need to cut out the rough openings in those materials too.
Step Five – Install Your Window
Now you can install the window! Use shims in pairs to center the window in the rough opening on all edges. Insulated windows have flanges, that provide a spot to attach the windows to the nailers you have installed. For insulated buildings, place the window over the vapor barrier, then apply Bituthene over the flange. Bituthene is a waterproofing membrane that seals the window, which will prevent rain and melting snow from leaking inside your building.
Step Six – Finish with Trim
Finally, you will need to install exterior and interior trim. Your trim will create a polished finish to your window installation. We usually trim our windows in pine, 1×3 boards work well. Triangle and octagon-shaped windows need the trim to be mitered to match each angle.
Round and arched windows are a little trickier since you will need to create rounded trim. Some people use small pieces of pine cut into small arches, then piece them together. We find that CDX plywood looks very similar to our pine. You can create a large protractor with string and a pencil to draw the shape of your trim with a pencil. Then, cut it out with a jigsaw.
Conclusion
You have a unique vision for your shed, garage, or cottage. Why not show off your style by installing odd-shaped windows? It’s easier than it looks, and in the end, you will impress all who gaze upon your masterpiece.