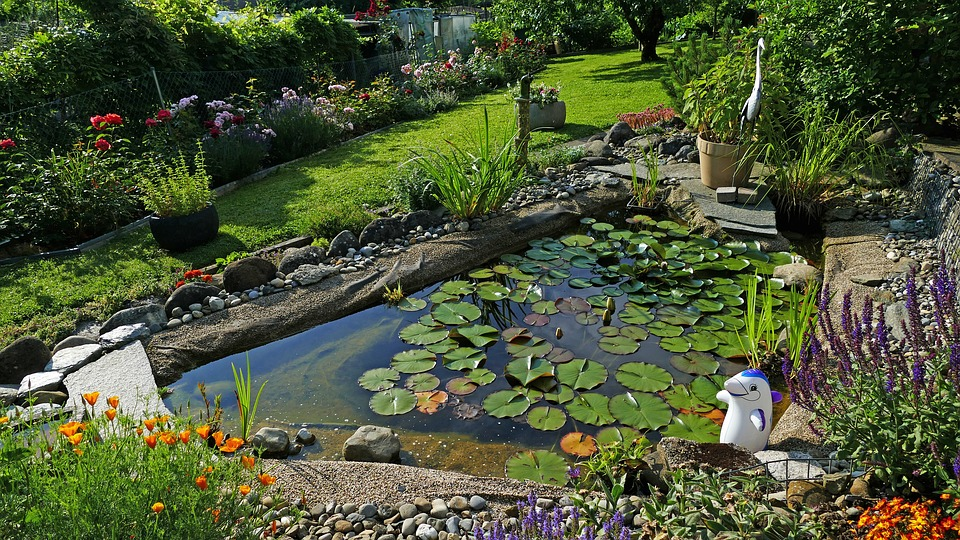
If you have decided to create a small garden pond, the first thing you should be thinking about is what type of pond you would like to have. Would you prefer it to be above-ground or in-ground? You also have to choose the type of construction needed. Would it be a flexible self-designed garden pond or a prefabricated one? Both of these have advantages and can be perfectly integrated into your garden with thorough planning.
Thorough Planning is Key
You have to take plenty of time to plan all the possible nuances: the pond type, size (dimensions), liner material, and many other features. It is always easier to build a pond following a well-prepared plan. Some may prefer to jump in with the build and fix any issues along the way. This approach could lead to scrapping the project and starting over from scratch. This is why you ought to look for pond ideas on the Internet or see the backyard of your neighbors. Consult a professional and decide on the type, size, and style of the construction before beginning the building process and its preparations. Make sure that you stick to the plan.
Decide What Type of Construction it Will Be
One of the first things that you need to decide is the type of construction. Here are some of my favorite pond construction types to get you started in the right direction.
The foil type is the perfect solution to integrate a pond of a preferred shape and dimensions in your garden. It looks especially natural, even large shallow water zones can be easily formed using it.
First, you should determine how much foil liner you require to build your dream pond. Make sure that you are going to use high-quality material so that you get to enjoy your little oasis for a long time. This is possible only if the chosen foil is durable, water-resistant, and rot-proof. I also recommend protecting the foil from excessive sunlight. In case your foil is UV-resistant, then you should still cover it for aesthetic reasons. Stones, special stone liners, or sedum mats are best suited for this. I would also recommend that you use dark colors since they enhance water reflection and as a result; your pond will appear to be deeper than it is. You also have to pay careful attention to the surface of the edges. You should smoothen it and ensure that you do not leave any sharp stones. This can be done using a layer of sand and then covering it with a protective fleece.
On the contrary, preformed plastic pond liners, made of high-density/ reinforced polyethylene or fiberglass, are extremely robust and almost indestructible. They come in all possible sizes, shapes, and surfaces, so they can meet almost any need. Also, their installation is faster and easier, compared to a foil pond. Another advantage of such liners is their mobility. It means that, if you happen to change your mind and would like to move your pond someplace else, it would be much easier and quicker. You simply should dig out your prefabricated pool and reinstall it at its new place or even your new home, if you end up moving somewhere else.
Some people also build a concrete pond, but it is not the most optimal variant since it makes it very difficult to move it or deconstruct it as well as being unable to make any adjustments to it.
Planning Out the Setting
After you had decided on the construction type of your future pond, the actual planning can now begin. First, determine its precise size and location. The ideal location for your garden lake would be in a partially shaded location in your backyard. Three to five hours of direct sunlight per day would be ideal for the water quality and the well-being of almost any plants and fish that live there. In case the pond would be exposed to sunlight for a longer period, you should consider shading it with an umbrella or border plants. This would be necessary to help prevent the water from becoming too warm and as a result affecting the growth of algae and other microorganisms.
If you decide to use border plants as a source for the shade you have to pay extra attention when choosing the type of plant needed. For example, foliage and conifer plants are not the best choices. This also applies to strongly rooted plants. One more thing to keep in mind is that when you choose border plants, you should place them far enough from the body of water. Mainly because as leaves fall in autumn they will immediately end up in the pond. This can negatively affect water quality. Furthermore, tree and shrub roots can make it difficult to dig out the preformed pond liner and may even damage it. Plants of the cypress family (Cupressaceae) should be avoided since their needles can poison the water as they fall into your pond. This rule is essential if you intend to build a fishpond.
Next, you will want to recreate the entire ecosystem in your yard to keep your fish in a healthy and clean environment. If it’s not an option, then you might consider installing a filter to remove excess dirt particles and reduce toxins. With the help of special test sticks, you can easily determine and control the water quality of your pond at any time. Also, a good investment would be buying a garden pond aerator, which helps protect against excessive vascular plants, green water, and the lack of oxygen in your pond. There are various solar aerator models on the market nowadays, so you won’t need to connect it to an electrical outlet. However, in case you get common electrical equipment, you might want to consider the need to plan a cable route for all the electrical devices. I recommend constructing your garden pond not very far from your house. Building a small garden shed with electricity supply nearby would be also a nice option for that purpose.
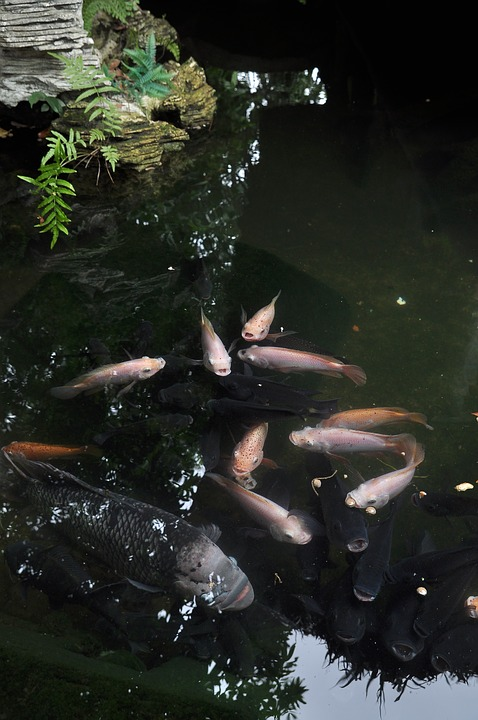
As early in the planning stage, you will also have to decide what type of fish (if any) you would like to have since it would also help you decide what pond equipment you require.
As for decorations, you might want to consider buying and installing LED-lights and fountains. The latter ones can serve not only in achieving a natural look and a soothing water splash but also maintain oxygen at a normal level, which is vital for the pond. To install one, you would need a pump that will transport the water from the pond to the source of the fountain. For a fishpond, it would be ideal if you can combine the pump with a suitable filtering system.
Speaking of LED-lights, they can add more liveliness to your pond, and that way you can enjoy watching it even during the late hours of the night. Illuminated ponds add a romantic feel to any outdoor dinner and can serve as a perfect decoration for summer garden parties.
Step-by-Step Building Tutorial
- Mark the outline of your future pond in the planned location. For example, with the help of a garden hose or wooden pegs. You should also identify damp, shallow, and deep-water zones.
- Start digging. First, remove any turf in the area planned for the garden pond, put it aside — you are going to need it after the pond is complete. Make sure that the sides of the hole are level. You can check it by placing a plank across it and using a spirit level. Make sure that you removed all stones and roots in that area.
- Model the different depth zones with the spade. You can secure them with the help of lean concrete if needed. Let’s say we are going to have around 20-30 cm deep damp water zone, around 60 cm deep shallow zone, and around 120 cm deep water zone.
- Fill the pond hole with a layer of sand. Naturally, you can use any other insulation material, for example, waterproof geotextile liner or even pieces of an old carpet. This step is crucial so you should not miss it. An isolation layer is needed for protecting the foil from future damage.
- Carefully place the foil into the hole, letting around 15 cm overlap. You must ensure that every cm of the foil is placed correctly into every corner inside the pond.
- After insulating and placing the foil in the pond hole, you should dig a shallow trench around the pond hole and tuck the overlapping edges of the foil into the trench.
- Now, it’s up to you on how you wish to cover up the foil at the edges and weigh it down. For example, you can use decking planks or stones. I prefer using a combination of special stone liners to cover the pond edges and then place stones on the top of it. It creates the most natural look.
- Put some sand on the bottom of every level of your garden pond and weigh the foil on each level with the help of the stones.
- Now, it’s time to fill your pond with water (preferably rainwater). To avoid sand from dispersing, try to direct the first water stream onto an object like a stone, and do that very slowly. In this stage, you should consider adding the needed equipment and planting some water weeds into the sand at the bottom of each water zone. After the water has completely covered the sand at each pond level, you can gradually start filling up the pond quicker.
- In this step, the foil may stretch and start to change its position at the edges. That’s not something to worry about since it is just adjusting itself. After the pond is full of water, weigh up the edges with the stones again. Now, it’s time to use the left aside turf. Place it over the edges around the stones, add some little stones and logs to achieve the most natural look. You can also plant something in the soil, but with time, this will happen on its own. Speaking of a fishpond, do not add fishes straight away, give it some time so that the water settles in (at least for one week).
So, as you have noticed from our pond design tips, setting up a garden pond is not rocket science and thinking it through takes more time than building it. Taking the time to plan properly can help avoid pitfalls during the building process. Once your design is ironed out, and materials are secured, it is very plausible to have your pond built over a weekend or two.
This article on how to create a small garden pond was contributed by Kimberly Cornish